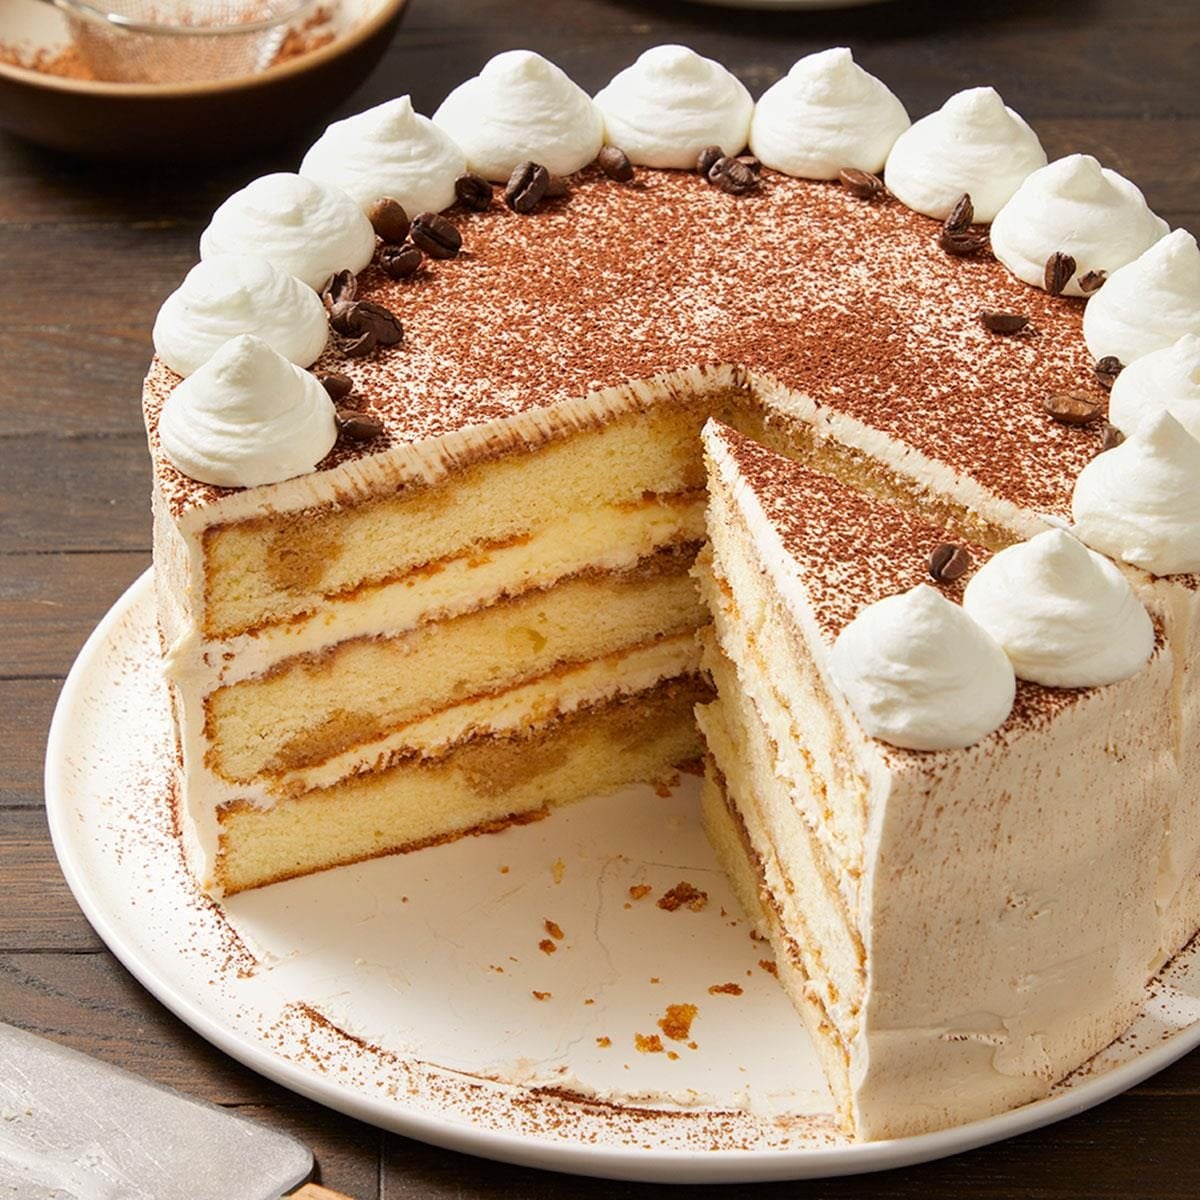
Can't get enough tiramisu? Neither can we; that's why we can't stop eating this tiramisu cake!
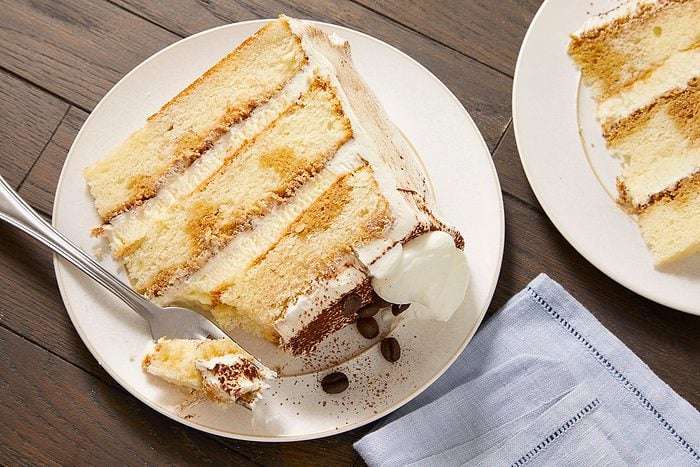
Sometimes it’s okay to turn a classic dessert on its head, especially when it’s as decadent as this recipe. This rich tiramisu cake has all the flavors of a traditional tiramisu, like mascarpone cheese, espresso and cocoa powder. But instead of ladyfingers, there are tender layers of vanilla sour cream cake.
Our tiramisu cake recipe has several steps that include baking the cake layers, whisking up the filling and making the Swiss meringue buttercream. They’re all straightforward, though, with clear instructions in the recipe. And this is definitely a baking project worth doing!
I love that this tiramisu twist is an ideal dessert for special occasions like milestone anniversaries, holiday tables and birthdays. My brother is a tiramisu devotee, so I’m surprising him with this cake for his special day.
Tiramisu Cake Ingredients
- Mascarpone filling: This is a mixture of soft mascarpone cheese (the same type used in these favorite mascarpone recipes) plus sugar with a little milk. Find mascarpone in the refrigerated case stocked with the ricotta and cream cheeses.
- Espresso soaking liquid: Included is a blend of strong brewed coffee, instant espresso powder and a liqueur, such as Kahlua, Marsala wine or rum. The liquid mixture is brushed onto the cake layers to infuse them with coffee flavor.
- Coffee frosting: Make a light and silky Swiss meringue buttercream with egg whites, sugar, salt and butter whisked over simmering water. And because it’s for a tiramisu cake, a little instant coffee is mixed in as well!
- Sour cream: The cake is especially rich and moist thanks to sour cream stirred into the batter.
- Vanilla flavorings: Give the cake a double hit of vanilla flavoring with both vanilla extract and vanilla bean paste, which has flecks of real vanilla bean pods and seeds.
- Eggs: You’ll need both whole eggs and egg whites for the cake batter. Here’s how to easily separate eggs with just the shells or with kitchen tools.
- Butter and oil: A blend of fats, butter and a neutral vegetable oil like canola or soybean, gives the cake a tender crumb as well as lots of flavor.
- Dry ingredients: To get a really soft cake, the best type of flour to use is a low-protein cake flour like Swans Down or Softasilk brands. Blend it with granulated sugar, baking powder and salt.
Directions
Step 1: Make the cake batter

Preheat the oven to 350°F. In a small bowl, mix the sour cream with the vanilla extract and vanilla bean paste until combined. Let it stand for 10 minutes.
Sift the cake flour, sugar, baking powder and salt together twice into a large bowl. Add the cubed butter and canola oil, and beat until the mixture looks crumbly. Add the egg whites, one at a time (about 2 tablespoons), beating well after each addition. Then, add the whole eggs, one at a time, beating after each addition. Finally, beat in the sour cream mixture just until it’s combined.
Editor’s Tip: While the sour cream mixture rests, line the bottoms of three greased 9-inch round cake pans with parchment, and then grease the paper.
Step 2: Bake the cake layers
Transfer the batter to the prepared cake pans. Bake the layers until a toothpick inserted into the centers comes out clean, 30 to 35 minutes. Cool the cakes in the pans for 10 minutes before removing them to wire racks. Peel off the paper, then cool the cakes completely.
Step 3: Make the frosting

In a heatproof bowl of a stand mixer, whisk egg whites with sugar and salt until blended. Place the bowl over simmering water in a large saucepan set over medium heat. Whisking constantly, heat the mixture until a thermometer reads 160°, for 8 to 10 minutes. Remove the bowl from the heat.

With the whisk attachment of the stand mixer, beat the mixture on high speed until it’s cooled to 90°, about 20 minutes. Add in instant coffee granules. Then, gradually beat in butter, a few tablespoons at a time, on medium speed until the frosting is smooth.
Step 4: Make the filling and soaking liquid
In a small bowl, whisk together the mascarpone cheese, sugar and milk. In a separate bowl, combine the strong coffee, espresso powder, and liqueur or Marsala wine.
Step 5: Assemble the cake

Place one cake layer on a serving plate, and liberally brush it with the espresso soaking liquid.

Spread a thin layer of frosting over the top, then pipe a frosting border around the cake layer. Fill the border with mascarpone filling.
Repeat these layers. Top them with the final cake layer. Frost the top and sides of the cake as you desire. Finally, sprinkle the top with cocoa powder.

Tiramisu Cake Variations
- Try another buttercream: This mocha buttercream has coffee and chocolate flavors, so it’d be perfect to use on this cake instead of Swiss meringue buttercream.
- Add a stencil design: Use a cake stencil to create a gorgeous cocoa powder design, name or message on the top of the cake.
How to Store Tiramisu Cake
It’s best to store the tiramisu cake in the refrigerator to protect the quality of the Swiss meringue buttercream and the espresso-soaked cake. Transfer the cake to a tightly covered cake carrier or to a cake stand with a dome cover. Hold it in the fridge until it’s time to serve. The cake will last up to five days.
Can you make components of tiramisu cake ahead of time?
Yes, completing the steps for the tiramisu cake ahead of time is a smart way to save time on the day you want to serve it. Transfer the finished Swiss meringue buttercream to a covered container and store it in the fridge for up to a week; the same goes for the espresso soaking liquid. The cake layers can be baked and cooled, then tightly covered with food wrap. Hold them in the fridge for a few days or in the freezer for up to a month. Finally, the mascarpone filling can be stored in a covered container in the fridge for up to three days.
Tiramisu Cake Tips
Why is my frosting grainy?
The Swiss meringue buttercream for this cake is made by whisking egg whites and sugar over simmering water; this step cooks the egg whites and also dissolves the sugar. If the frosting is grainy, it means that the sugar didn’t completely dissolve.
When making the frosting, whisk the whites and sugar mixture constantly over simmering water until the temperature reads 160° on a digital thermometer. Take a little frosting out with a spoon; when it’s cool enough, touch it with your fingers. If it feels grainy, continue whisking the mixture over simmering water until it feels smooth.
You can also attempt to fix grainy frosting after the fact: Microwave a small portion of frosting until it’s melted, then beat it back into the rest of the buttercream until it’s smooth throughout. However, you may simply have to make a new batch.
Why didn’t my frosting whip up?
When Swiss meringue buttercream won’t whip up and has a loose, soupy texture, one possible reason is that the egg whites weren’t whisked enough. It can also happen when the butter or frosting mixture is too warm.
To fix this, place the bowl of frosting in the refrigerator for 15 to 30 minutes; the cold will help firm up the butter in the mixture. Return the bowl to the stand mixer and beat the frosting until it whips up as it’s supposed to.
Ingredients
- 1-1/2 cups sour cream
- 1 tablespoon vanilla bean paste
- 1 tablespoon vanilla extract
- 4 cups cake flour
- 2-1/2 cups sugar
- 4-1/2 teaspoons baking powder
- 2 teaspoons salt
- 1 cup unsalted butter, softened
- 1/4 cup canola oil
- 6 large egg whites, room temperature
- 2 large eggs, room temperature
- frosting:
- 6 large egg whites, room temperature
- 1-1/2 cups sugar
- 1/2 teaspoon salt
- 1/2 teaspoon instant coffee granules
- 2 cups unsalted butter, cubed
- filling:
- 1 cup mascarpone cheese
- 2 tablespoons sugar
- 2 tablespoons whole milk
- espresso soaking liquid:
- 3/4 cup strong brewed coffee
- 2 teaspoons instant espresso powder
- 2 tablespoons Marsala wine, Kahlua (coffee liqueur) or rum
- Baking cocoa, for garnish
- Optional: espresso beans and sweetened whipped cream
Directions
-
1Preheat oven to 350°. In a small bowl, mix sour cream, vanilla paste and vanilla extract until combined. Let stand 10 minutes. Line bottoms of 3 greased 9-in. round baking pans with parchment; grease paper.
-
2Sift cake flour, sugar, baking powder and salt together twice into a large bowl. Add butter and canola oil; beat until mixture is crumbly. Add egg whites, 1 at a time (about 2 tablespoons), beating well after each addition. Add eggs, 1 at a time, beating well after each addition. Beat in sour cream mixture just until combined.
-
3Transfer batter to prepared pans. Bake until a toothpick inserted in center comes out clean, 30-35 minutes. Cool in pans 10 minutes before removing to wire racks; remove paper. Cool completely.
-
4In a heatproof bowl of a stand mixer, whisk egg whites, sugar and salt until blended. Place over simmering water in a large saucepan over medium heat. Whisking constantly, heat mixture until a thermometer reads 160°, 8-10 minutes.
-
5Remove from heat. With whisk attachment of stand mixer, beat on high speed until cooled to 90°, about 20 minutes. Add in instant coffee granules. Gradually beat in butter, a few tablespoons at a time, on medium speed until smooth.
-
6In a small bowl, whisk together mascarpone, sugar and milk.
-
7In a separate bowl, combine coffee, espresso powder and Marsala wine.
-
8To assemble, place 1 cake layer on a serving plate; liberally brush with espresso soaking liquid. Spread with a thin layer of frosting. Pipe a border around the cake layer; fill with mascarpone filling. Repeat layers; top with remaining cake layer. Frost top and side of cake as desired. Sprinkle with cocoa powder. If desired, decorate with whipped cream and garnish with espresso beans.