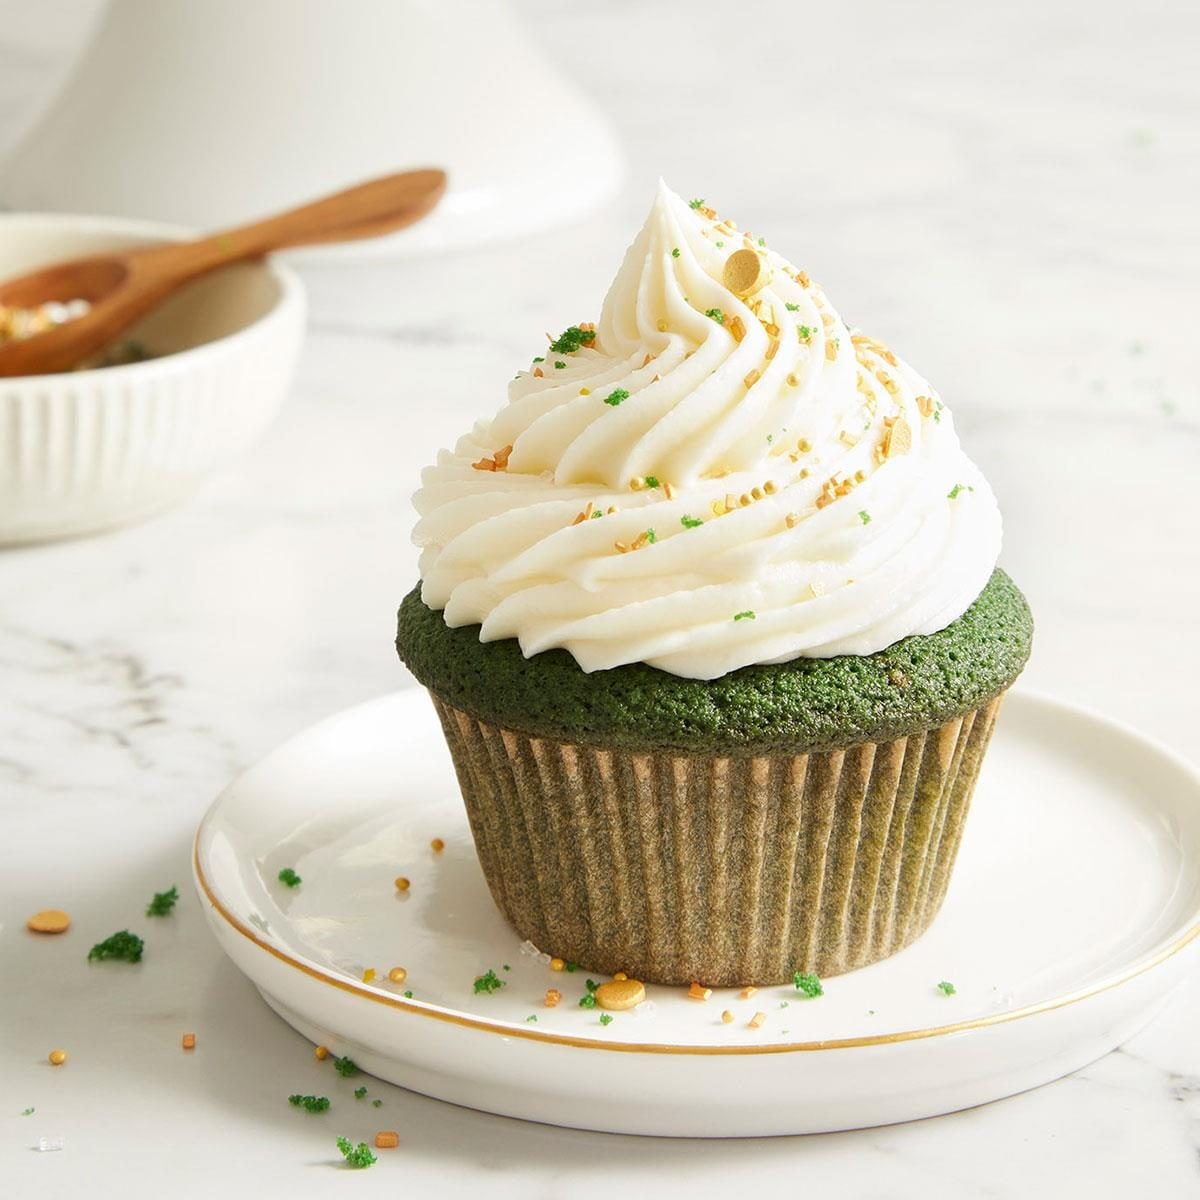

These moist and fluffy green velvet cupcakes with cream cheese frosting will leave your old-fashioned red velvet recipe green with envy this St. Patrick's Day.
Put a fun, simple twist on an old classic by making green velvet cupcakes. Yes, you read that correctly: green velvet. While red velvet recipes will forever have a special place in our hearts (and stomachs), this green velvet cupcake recipe is our new favorite green food for St. Patrick’s Day.
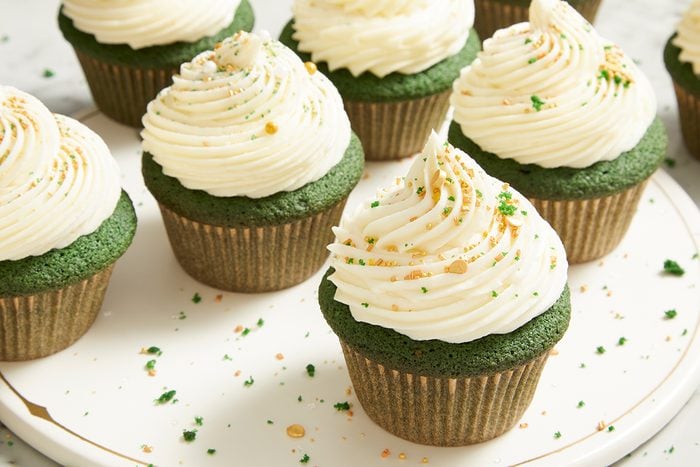
These green velvet cupcakes are delicate and ultra-moist. Each one is crowned with a generous swirl of homemade cream cheese frosting that accentuates the wonderfully subtle tangy flavor of the cake. Once you decorate these cupcakes with green sprinkles, golden chocolate leprechaun coins or shamrock-shaped edible decorations, you’ll leave everyone dancing an Irish jig as they devour every last crumb.
Ingredients for Green Velvet Cupcakes
Cupcakes:
- Cocoa powder: Since red velvet cake is defined not only by cream cheese frosting but also by food coloring, buttermilk and cocoa powder, we use a small amount of cocoa powder to make green velvet cupcakes. Cocoa powder provides a subtle chocolate flavor.
- Instant espresso powder: Coffee is the secret ingredient in many chocolate desserts because it amplifies the flavor of the chocolate. Instant espresso powder helps the flavor of the cocoa powder become more pronounced.
- Flour: While some cupcake recipes use other types of flour like cake flour, this green velvet cupcakes recipe uses everyday all-purpose flour.
- Salt: Salt balances the sweetness of the cake and enhances the cocoa flavors in green velvet.
- Leavening agents: This cupcake recipe uses both baking soda and baking powder. Baking soda helps create an ultra-tender crumb, while the baking powder helps make the cake super light and airy.
- Butter: The butter in these green velvet cupcakes gives them a sinfully rich flavor and helps incorporate air into the batter, making the cupcakes wonderfully fluffy.
- Sugar: In cupcakes, sugar sweetens the cake and also helps keep the cupcakes tender.
- Oil: Cupcakes and cakes made with oil tend to be more moist than those exclusively made with butter.
- Eggs: Eggs are important in cupcakes and cakes because the eggs add to a cake’s softness while also providing structure and stability.
- Vanilla: For the best green velvet cupcakes, use a high-quality brand of vanilla extract.
- Buttermilk: When making red velvet or green velvet cake, don’t skip the buttermilk. It’s what gives velvet cakes their signature tangy flavor and irresistible moisture. If you’ve got some leftover, don’t fret: There are plenty of other uses for buttermilk.
- Green food coloring: For the best pigmentation, use gel food coloring for this green dessert. Liquid food coloring may also be used, but you may need to use more to achieve a vibrant hue.
Frosting:
- Butter: Butter adds richness to the cream cheese frosting and helps give it some stability once chilled.
- Cream cheese: For the best cream cheese frosting, choose a high-quality cream cheese brand, as these will blend more smoothly than budget brands. Also, use block-style cream cheese—not whipped cream cheese or cream cheese spread since they contain additives that will impact the texture and consistency of the frosting.
- Vanilla: A touch of vanilla extract adds depth of flavor to the frosting.
- Salt: A pinch or two of salt maximizes the tang of the cream cheese and balances the sweetness of the confectioners’ sugar.
- Confectioners’ sugar: Make sure to use confectioners’ sugar for the frosting. Granulated sugar will make your frosting gritty and will not blend smoothly with the other ingredients.
Directions
Step 1: Mix the buttermilk and espresso powder
Preheat the oven to 350°F. Line a standard-size muffin pan with paper liners.
In a small glass measuring cup, whisk together the buttermilk and instant espresso powder until combined. Set aside.
Step 2: Combine the dry ingredients
In a large mixing bowl, whisk together the flour, cocoa, baking powder, baking soda and salt. Set aside.
Step 3: Mix the wet ingredients
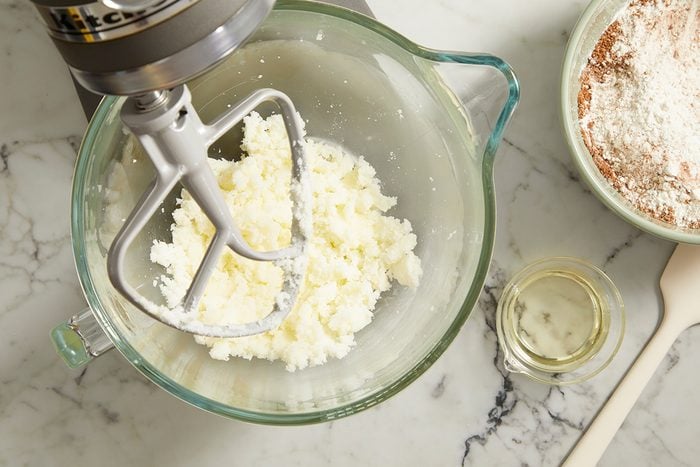
In the bowl of a stand mixer (or a regular bowl if you want to use an electric mixer), cream together the sugar and butter for three to four minutes until smooth and creamy. Then, add the oil and beat vigorously for two minutes.
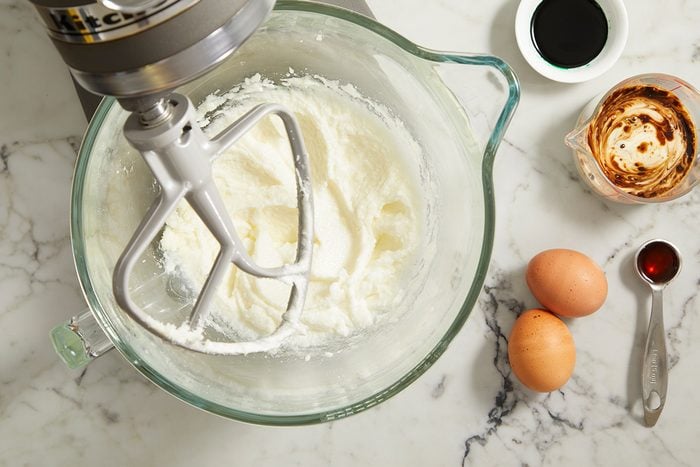
Add the eggs, buttermilk mixture, green food coloring and vanilla, and beat for another one to two minutes until evenly combined.
Step 4: Finish prepping the batter
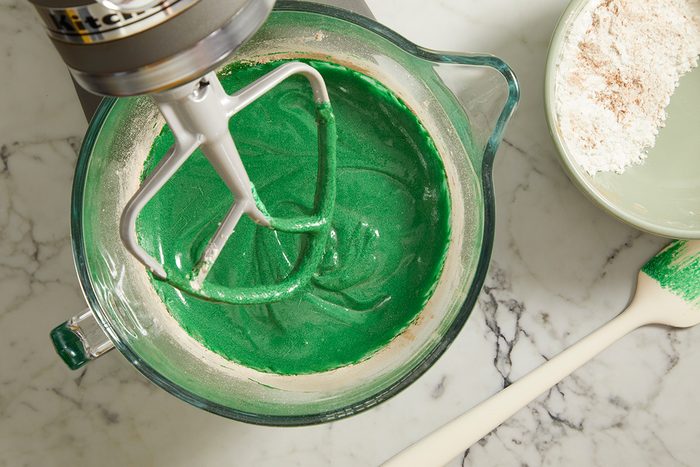
Next, gradually add the dry ingredients to the wet ingredients, stirring after each addition until no dry patches remain.
Editor’s Tip: Feel free to adjust the amount of green food dye in the recipe to achieve the green hue that you desire.
Step 5: Fill the muffin cups and bake
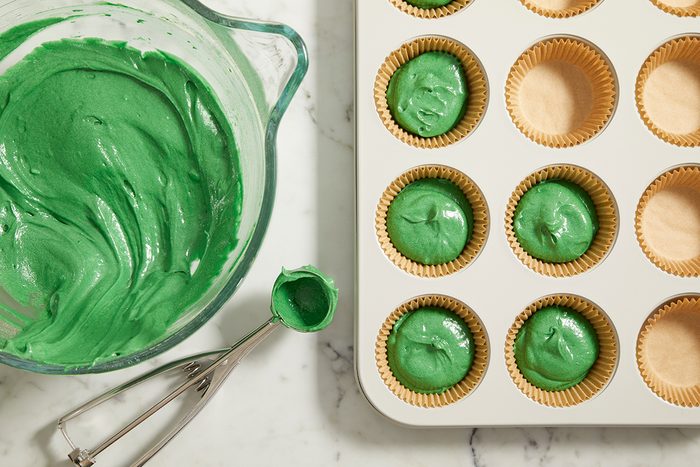
Next, fill each muffin cup about two-thirds full with batter. Tap the pan gently on the counter to release any air bubbles, and then transfer the pan to the preheated oven. Bake for 18 to 20 minutes or until fully baked. Remove promptly and let cool for five minutes in the pan before transferring them to a wire rack to cool completely.
Editor’s Tip: You can test a cupcake or cake for doneness by inserting a toothpick into the center. If it comes out clean, the cupcakes are fully baked. You can also use an instant-read thermometer to test a cupcake for doneness. When the center registers between 205° and 210°, the cupcakes are fully baked.
Step 6: Make the frosting
In the clean bowl of a stand mixer, beat the butter and cream cheese together until smooth and fluffy, three to four minutes. Add the vanilla and salt, and beat for another 30 seconds to combine. With the mixer on low, gradually add the confectioners’ sugar and continue to mix until completely combined.
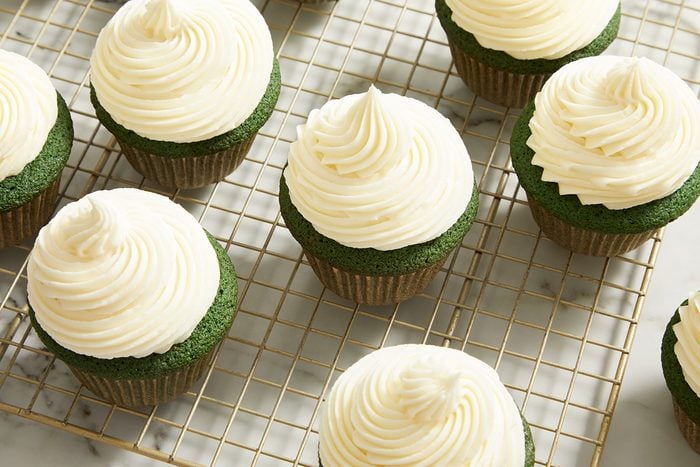
Step 7: Decorate the cupcakes

Fill a pastry bag fitted with a large star or round tip with the prepared frosting. Then, pipe a generous swirl of frosting on top of each cooled cupcake. Decorate with sprinkles and edible decorations of your choice and serve.
Editor’s Tip: If you prefer a lesser amount of frosting, you can cut the frosting recipe in half and use an icing spatula to spread a thinner layer onto each green velvet cupcake.
Green Velvet Cupcake Variations
- Try other colors: Why stop at green velvet? Make blue velvet cake, orange velvet or even tie-dye velvet if you would like. Swap in other dye colors to suit your mood, your preference or whatever holiday you’re celebrating.
- Use natural food coloring: Not into artificial food dyes? You can experiment with using natural food dyes to make these green velvet cupcakes.
- Whip up a different frosting: If you’re not a fan of cream cheese frosting, swap in another flavor you enjoy. Old-fashioned ermine frosting is wonderfully light and fluffy, while a classic chocolate buttercream frosting would make the green velvet cupcakes ultra-decadent.
How to Store Green Velvet Cupcakes
As with many of our favorite desserts with cream cheese frosting, these green velvet cupcakes also should be kept refrigerated. Store them in an airtight food storage container or handy cupcake caddy.
How long do green velvet cupcakes last?
This green velvet cupcake recipe will stay fresh for three to five days in the refrigerator. We suggest letting the cupcakes sit at room temperature for 30 minutes before serving to remove some of the chill and maximize flavor.
Can you freeze green velvet cupcakes?
Yes, you can freeze cupcakes the same way you would freeze cake. Unfrosted or decorated cupcakes can be placed in an airtight food storage container and stored in the freezer for up to three months. Thaw completely in the refrigerator before serving.
Green Velvet Cupcake Tips
What’s the secret to moist green velvet cupcakes?
Buttermilk! As in other red velvet recipes, buttermilk is added to the batter here to give the green velvet cupcakes a subtle tang and to infuse them with extra moisture. In fact, adding buttermilk to a boxed cake mix is one of our favorite ways to make a boxed cake mix taste homemade. Additionally, this recipe also uses both butter and oil. Butter gives the cupcakes a wonderfully rich butter flavor, while the oil helps keep the cupcakes moist and tender.
Can you make this recipe as a green velvet cake?
Yes, you can easily adapt this baking recipe to a different pan size. Use the recipe to bake three 6-inch round cakes, or double it to make two 9-inch round cakes. For either option, increase the bake time until the cakes pass the toothpick test or register an internal temperature of 205° to 210°. The 6-inch cakes will likely need about 20 to 24 minutes in the oven, while the 9-inch cakes may need closer to 30 or 35 minutes.
Why did the cupcakes stick to the liners?
Nothing is worse than beautiful-looking cupcakes that stick to the liners, and this can happen for several reasons. A cupcake batter that is high in sugar or low in fat can often be more prone to sticking. Underbaking the cupcakes or using poor-quality cupcake liners can also be responsible for cupcakes that stick. For the best results, lightly spray the liners with cooking spray, measure accurately and choose good-quality paper liners.
Why did the cupcakes sink in the middle?
A cupcake with a sunken center is another common tragedy in the world of cupcakes. To prevent this, avoid the temptation to open and close your oven frequently, as this can affect the temperature of your oven. Finally, make sure to completely bake your cupcakes, as underbaking is perhaps the most common cause of a sunken cupcake center.
When can you serve green velvet cupcakes?
Did you miss St. Patrick’s Day? Don’t worry, it’s still your lucky day. You can enjoy this green velvet cupcake recipe at other times of the year too. Pair the cupcakes with our favorite red velvet cake recipe for a Christmas-colored dessert duo for your holiday table. You could also decorate them with soft pastel frosting and chocolate eggs for Easter, or prep them as a tailgating dessert to support your favorite green-clad sports team.
Ingredients
- cupcakes:
- 1-1/2 cups all-purpose flour
- 2 tablespoons baking cocoa
- 1 teaspoon baking powder
- 1/2 teaspoon baking soda
- 1/2 teaspoon salt
- 1/2 teaspoon instant espresso powder
- 1 cup sugar
- 1/4 cup unsalted butter, softened
- 1/4 cup canola oil
- 2 large eggs, room temperature
- 1/2 cup buttermilk
- 1 tablespoons green food coloring
- 1 teaspoon vanilla extract
- frosting:
- 1/2 cup (1 stick) unsalted butter, softened
- 1 package (8 ounces) cream cheese, softened
- 1 teaspoon vanilla extract
- 1/2 teaspoon salt
- 3-1/2 cups confectioners' sugar
- Sprinkles or edible decorations, optional
Directions
-
1Preheat oven to 350°. Line a 12-cup muffin pan with paper liners.
-
2In a small glass measuring cup, whisk together buttermilk and instant espresso powder until combined; set aside. In a large mixing bowl, whisk together flour, cocoa, baking powder, baking soda and salt; set aside.
-
3In the bowl of a stand mixer fitted with the paddle attachment, cream sugar and butter for 3-4 minutes or until smooth and creamy. Add oil; beat vigorously for 2 minutes or until pale in color. Add eggs, buttermilk mixture, food coloring and vanilla extract; beat another 1-2 minutes or until evenly combined. Gradually add dry ingredients to the creamed mixture, stirring after each addition until no dry patches remain.
-
4Fill each muffin cup about two-thirds full with batter. Tap the pan gently on the counter to release any air bubbles. Bake 18-20 minutes or until a toothpick inserted into the center comes out clean; let cool 5 minutes. Remove cupcakes from the muffin tin; transfer to a wire rack to cool completely.
-
5In a clean stand mixer bowl fitted with the paddle attachment, beat butter and cream cheese 3-4 minutes or until smooth and fluffy. Add vanilla extract and salt; beat another 30 seconds to combine. With the mixer on low speed, gradually add confectioners' sugar; continue to mix until completely combined.
-
6Fill a pastry bag fitted with a large star or round tip with the prepared frosting. Pipe a generous swirl of frosting on top of each cooled cupcake. Decorate with sprinkles and edible decorations, if desired.


