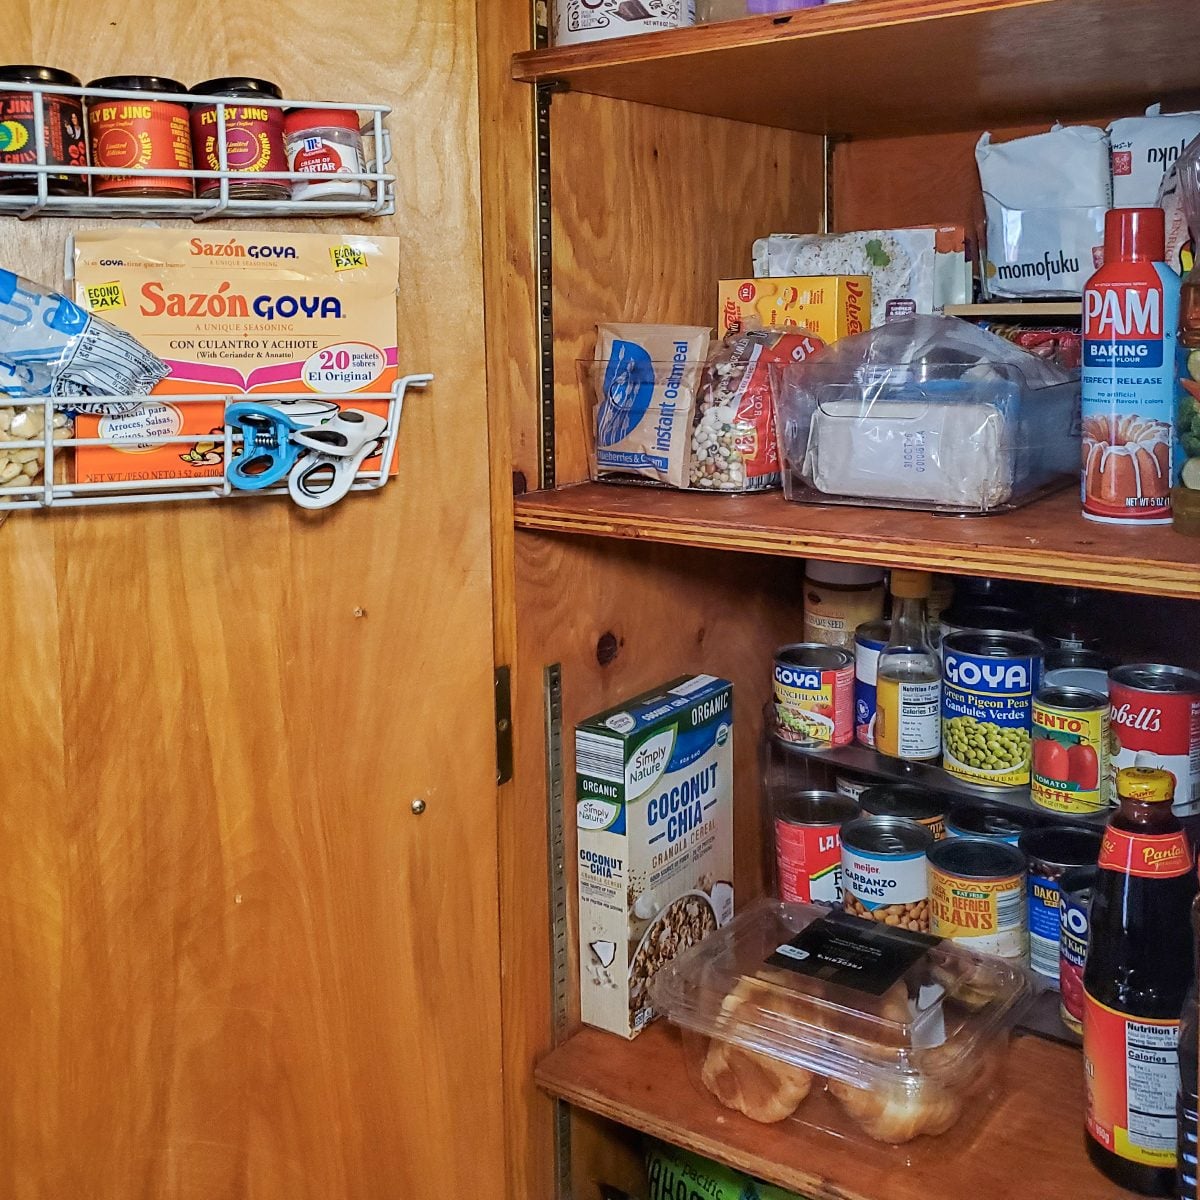
We spoke to three professional organizers to find out whether it's possible to organize a pantry on a strict budget. Then, we put their tips to the test.
Our editors and experts handpick every product we feature. We may earn a commission from your purchases.
Learn more.
When I first moved into my home, I was ecstatic to finally have a proper pantry. But as I put my items away and it became more lived-in, I started to notice that opening my pantry for anything brought a wave of anxiety. Over time, it became cluttered and confusing. My space was no longer serving me—it was keeping me from baking, which is a huge hobby of mine. I knew it was time to make a change.
“A pantry is like any other space. Too much visual clutter is overwhelming,” says Getting it Done Organizing founder Jenny Dietsch. She’s right—an overwhelming space makes meal prep into a chore. It was time to take action. But before mapping out the best way to approach my messy cupboard, I had to call in some experts. To hear a few different perspectives, I spoke with three professional organizers. They walked me through the steps they use with their own clients and offered expert tips to help me through my own organization journey.
With the help of experts, here’s how I took my pantry from blah to bravo, all for under $100—and how you can, too.
Here’s Why Organization Matters

Sure, we all know that a messy pantry looks bad. But according to Corey Pence, Sr. Manager of In-Home Organization at The Container Store, there are several additional benefits to tidying things up.
- Improved focus and clarity: “With fewer distractions, focusing on the most important tasks becomes easier.”
- Reduced stress and mental fatigue: “Clutter takes a toll on our mental well-being as the brain has to work harder to filter out non-essential information. When our environment becomes less cluttered, our stress levels naturally decrease and our ability to relax increases.”
- Enhanced aesthetics: “Less clutter feels more sophisticated and is visually pleasing, and it also allows the most important elements to stand out.”
- Increased functionality: “It can be hard to navigate a space that feels full. Reducing clutter makes it easier to move around, access needed items, and maintain organization.”
- Increased productivity and boosted creativity: “An uncluttered space is generally more conducive to productivity. As distractions are minimized, efficiency increases and mental space is cleared for more creative thinking. Organized spaces make us less likely to feel overwhelmed, which frees our minds to generate new ideas.”
Speaking from personal experience, the worst part about having a jumbled-up pantry is the sheer overwhelm of it all. Sometimes I open my pantry for dinner, only to close it and order takeout instead. Obviously, relying on takeout is not the healthiest or most wallet-friendly way to live. But when your pantry is a total mess of boxes, bags and bottles, finding ingredients at a glance is next to impossible.
“If it’s not easy to see or get to many of the items in your pantry, you’re going to have items go unused,” says Michelle Parravani, owner of Designing with Less. “Food might go to waste simply because it’s stuck in the back of a deep cabinet.”
If you’ve ever hunted for a bottle of vanilla or a bag of flour in your pantry, you probably need a better system. This was especially true for my baking supplies. Take it from me—trying to find a humble bottle of vanilla in a sea of boxes and bags is a one-way ticket to ordering Crumbl instead.
What You Can Do About It
Figuring out where to begin is oftentimes the hardest part of organizing a pantry. To help create a process, my first step in organizing my own pantry was connecting with professional organizers for tips. If you have the money to do so, working directly with a professional organizer is the best way to overhaul your pantry space.
“Working with a professional organizer allows someone new with fresh eyes to look at your space. Often, we are so used to something a particular way that we can not see any other possible solutions,” says Jenny. “Organizers have typically worked in hundreds of pantries and have seen what works and does not work for others and can bring fresh ideas.”
She also notes that organizers are experts on products, so they may know just the thing to make the difference. Not having to do all the research, measuring and product hunting can also eliminate stress in the process.
“We know what to do and can probably work through the steps faster than you can,” says Jenny. “We know how to measure the spaces and how to utilize those deep shelves and corners efficiently.”
For those who don’t have access to a professional, don’t worry. Below is a general rubric that you can refer to as you work on your pantry organization project:
- Identify pain points
- Empty and measure the space
- Cleaning and culling
- Create zones
- Purchase helpful products (and budget efficiently)
- Repurpose items you already own
- Keep to your method
We’ll break down each step below.
Identify Pain Points
According to Michelle, the first step when organizing a pantry is identifying any issues with your current setup.
While some solutions are universal, Michelle stresses the importance of making the space work for you, rather than the other way around. Noting annoyances as you use your space is a great way to identify the most important solutions to focus on. Doing this ahead of time also helps later when you’re actually reorganizing. Think of this pre-organizing step as gathering data.
“Think about what annoys you about your pantry, and create a solution for that. What costs you lots of time when you’re cooking or making your shopping list? Those are what you want to keep in mind, not only how everything looks,” she says. “A pretty pantry can be a wonderful thing, but solving current issues or annoyances will make you feel just as relaxed.”
For me, my biggest pain point was navigation. I had no idea what I owned or where it was. My pantry was like the wild west—unpredictable and occasionally dangerous. An avalanche of dry goods was not an uncommon disaster in my home, and that needed to change.
Empty and Measure the Space

“First, when cleaning and organizing a pantry, it’s most important to begin by taking everything out of the pantry,” says Michelle. “You can do this shelf by shelf if you don’t have a ton of space, but it’s best to take everything out to start, because that makes it easier to organize things differently.”
You should also measure your space while it’s empty, especially before making any organizer purchases. Write down these measurements so you don’t forget!
“After measuring, decide what supplies you need and purchase more than you think you need. It’s not fun when you are almost done with a project, and you are short of bins or baskets,” says Jenny. “Better to buy more than you need, finish the project, and return any extras.” You can always use any extra bins or risers in other spaces, such as your bathroom or kitchen counter.
Emptying out my pantry gave me a clear picture of exactly how much space I have—and how much of that space is “empty space.” This also helped me come up with solutions that used the tall, narrow shelving rather than fighting it.
Cleaning and Culling

“The easiest place to start is simply by removing expired items,” says I Speak Organized founder Melanie Summers. “Most people are surprised how much space they gain just from doing that.”
She’s right about that. After pulling out and tossing expired items, I nearly halved the number of items in my pantry. I also found something I didn’t expect: duplicates. I had no idea my disorganized cupboard was hiding multiple cocoa powders, oats containers, bags of brown sugar and granola!
“If you can see what you have, it makes it easier to shop your pantry before you go to the store and eliminates you from buying duplicates of things you already have,” says Jenny.
“Another big issue I see is people storing everything in bulk directly in the pantry,” Melanie notes. “Many households shop at Costco or similar stores and try to store all the backstock on the same shelves. I recommend keeping only what you need for the week in the pantry and storing bulk backup items elsewhere if possible.”
If you don’t have the space for that, Jenny suggests storing all bulk and back stock on the top shelf, which is what I opted to do.
Once everything is removed and the expired items are tossed, rip up and replace any contact paper and wipe down the shelving. While it only takes a few minutes, this is an important step—it’s best to begin with a clear slate. Plus, ripping up old, ugly contact paper is kind of a euphoric experience.
Create Zones

According to all three professional organizers, creating clear zones is the foundation of an organized pantry.
“What do you reach for most often? Keep those items in the easiest place to access, front and center,” says Melanie. “Is there anything that gets lost that you wish you could be reminded of more often? Store those within easy reach, too. Then group like items together.”
As for determining your groupings, there are several approaches.
“You could group by meal type—all the breakfast foods are together, or all the snacks are together—or you could sort by container type, which is often necessary if shelf heights are an issue with storing certain items,” says Michelle.
I opted to create several zones: baking supplies, bulk/duplicate items, pet items, ready-to-make meals, sauces and seasonings, grains like dry pasta and rice and a final section for grab-and-go snacks.
Purchase Helpful Products
The next step is figuring out what product you need to contain your zones. While you can certainly splurge here, Jenny offers a helpful tip for those reorganizing on a budget: comb through organizing blogs, then check Amazon and Dollar Tree for cheaper dupes.
After speaking with the three experts and showing them pictures of my pantry, I noticed several of their product suggestions overlapped. These were the solutions I prioritized when organizing my own cupboard. Once I live with this setup for a while, I’ll get a better idea of what works and what doesn’t. I can always change things around a bit later.
If you’re not sure if an organizer will work for you, I recommend buying a cheaper version and upgrading later if you end up loving it. I opted to buy my organizers from Amazon because of the generally lower prices. I also started a wishlist at The Container Store filled with pricier, more aesthetic upgrades for the future.
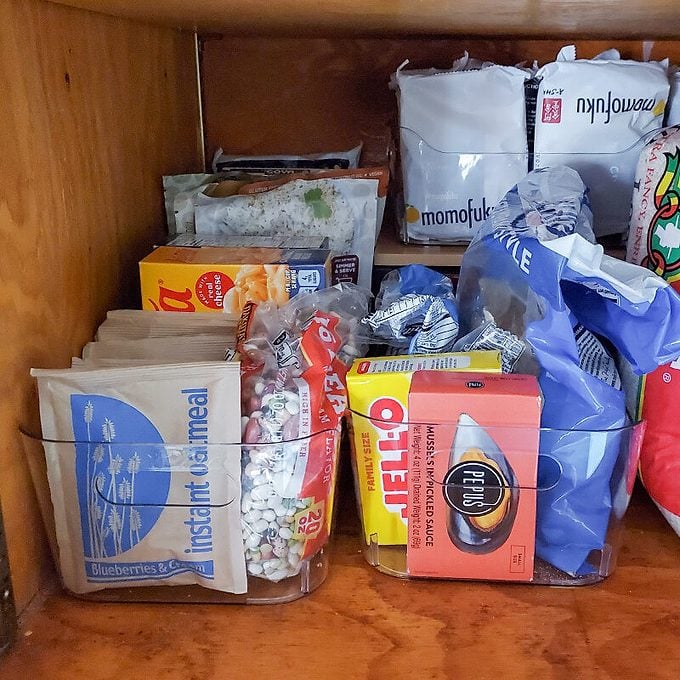
Clear Bins
Creating zones using bins was one of the main suggestions that all three professional organizers stressed the importance of. I love these bins from Amazon, since they’re a good medium size that works for a lot of spaces. You can also snag a pack of 12 for just around $25, which is a great deal!
“Bins or baskets allow you to create clear zones so categories stay contained,” says Melanie. “The goal is visibility and accessibility. If you can see it and reach it easily, you’re much more likely to keep things organized.”
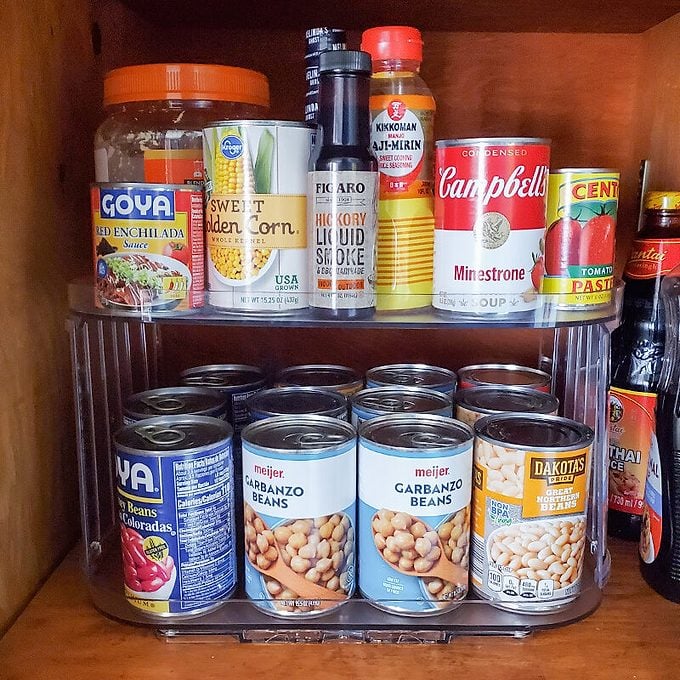
Lazy Susan
“Turntables or lazy Susans are incredibly helpful for oils, sauces, and condiments, so items in the back don’t get lost,” says Melanie. I particularly like this one for my taller cabinet, since it comes with an optional extra tier. It’s big and strong enough to fit all of my sauces, cans and seasonings. The rotating mechanism is very smooth and offers a lot of flexibility since it doesn’t require much room to swivel.
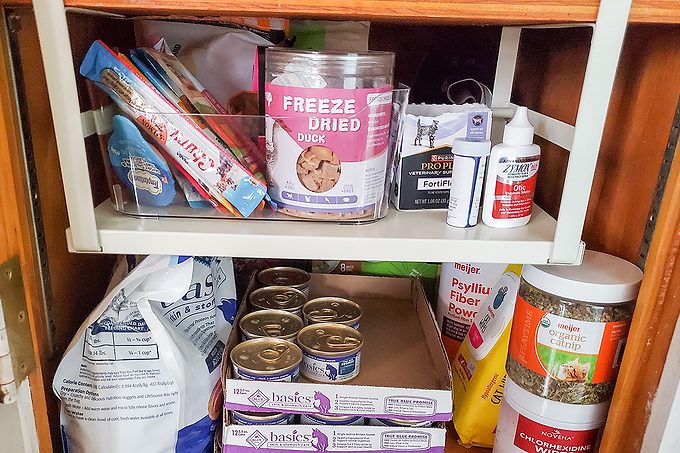
Hanging Shelves
“Undershelf baskets that hang from the shelf above or shelf inserts could help utilize more of the vertical space, so you can see more of the items on a shelf,” says Michelle. Notably, my cupboard is incredibly deep and tall. Utilizing this vertical space correctly is absolutely essential, especially given how narrow my pantry is. I like the idea of baskets, but I don’t love the big holes that items can fall through.
Instead, I found these super sturdy metal hanging shelves. They’re simple to assemble, sturdy and add the perfect amount of extra space for smaller items like seasonings, small bins, packets and other miscellaneous items. The two-pack is super handy for tall spaces. I ended up using one on my “pet shelf” to organize my cats’ treats and medications. I didn’t need the second for my pantry, so I have it hanging on my work desk for some extra space.
Shelf Risers
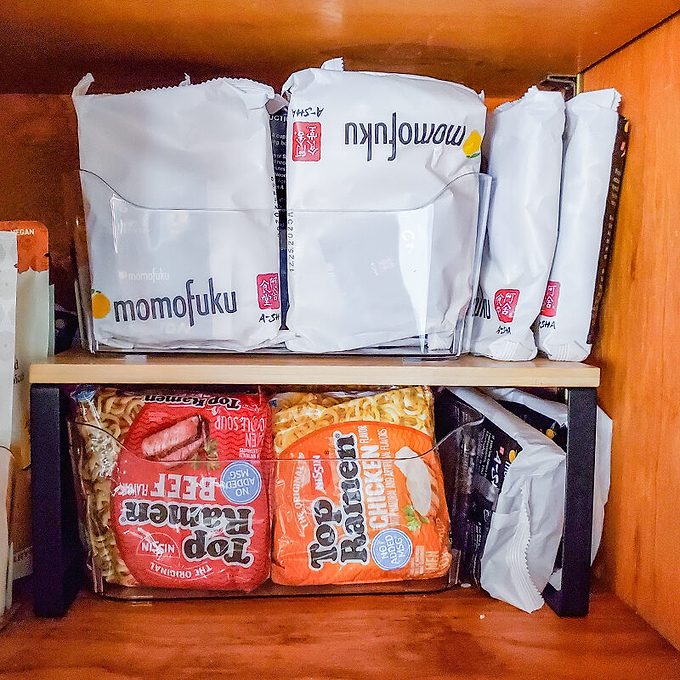
“Shelf risers help maximize vertical space and make smaller items easier to see,” says Melanie. Risers are also a great way to add more shelving to tall, open spaces. If you ever decide to remodel, you can always use these same risers to organize your countertops as well.
I personally like this two-pack of wooden risers. Not only is it inexpensive, but you can stack them for extra-tall spaces. They’re also super easy to assemble and very, very sturdy. The wood is attractive as well, making these risers a great pick for countertops, too.
Budget Efficiently
Don’t feel like you have to run out and purchase all the cool organizers you see on social media right away. Stick to solutions tailored to your needs. Once you live with your space for a while, you’ll learn what solutions are worth splurging on and which are worth skipping.
“If your pantry has one big problem you want to solve, that’s what you want to spend your money on,” says Michelle. “For example, if you feel like you waste a lot of time searching for spices, then maybe a better spice rack or new spice jars would help save you time and stress. If you have trouble reaching taller parts of your pantry, a study, easy-to-store foldable step stool might be worth buying.”
Repurpose Items You Already Own

No budget for fancy organizers? No problem. You can always get started with some items you already have lying around.
“Some of my favorite budget-friendly solutions include reusing shoe boxes or phone boxes to create categories, repurposing boxes from Costco or other grocery stores, or using inexpensive bins from the dollar store,” says Melanie. She notes that items like gift boxes or even cut-down Amazon boxes work in a pinch.
“Even simple DIY labels made with masking tape and a marker can help maintain zones. The most important part of organizing is creating clear categories and giving everything a designated home. The containers themselves can be very simple,” she says.
Keep to Your Method
Above all, keeping your space organized during day-to-day use is the most important tip once you’ve effectively set up your pantry.
“Follow your zones and systems. If you let it slip, you will need a complete redo later instead of just keeping up the systems you already have,” says Jenny. She notes that labels can really help with this, as you won’t forget where things go. In addition, you want to make sure you’re leaving space for future purchases.
“Reserve some space for new things, holiday foods, specialty items,” continues Jenny. “If every inch is crammed full you will not have space for the canned pumpkin, cranberry sauce, or birthday treats.”
According to Melanie, it helps to do a quick pantry refresh every three months to remove expired items and reset categories.
FAQ
What are some issues that can arise from a messy pantry?
Sr. Manager of In-Home Organization at The Container Store Corey Pence notes that one of the most common issues we see with a messy pantry is the accidental purchase of duplicates.
“When items don’t have a designated place, or can’t be easily found, it’s easy to assume you’ve run out and buy them again. This not only leads to wasted money, but also wasted time spent making unnecessary trips to the store,” he says. “While this often happens with food, it extends beyond that. We frequently see duplicates of items like cupcake liners, small appliances, and storage containers piling up simply because they were out of sight and out of mind.”
What are the 7 pantry zones?
According to Corey Pence, Sr. Manager of In-Home Organization at The Container Store, the seven pantry zones are:
- Breakfast
- Snacks
- Baking
- Canned goods
- Dinner/quick meals (pasta, mac ‘n cheese, meal helpers, etc)
- Oils/condiments
- Bulk items (rice, beans, paper towels, etc)
Why You Should Trust Us
For this piece, we contacted three organization experts for insights, along with Corey Pence, Sr. Manager of In-Home Organization at The Container Store. Professional organizers we interviewed include owner of I Speak Organized, Melanie Summers, owner of Designing with Less, Michelle Parravani and founder of Getting it Done Organizing, Jenny Dietsch. Their valuable insights helped inform the piece and the processes I used to organize my own cupboard.