Here's how to avoid a cake fail or sunken loaf of bread when you are tackling the challenges of high-altitude baking.
If you’ve ever moved to Denver, Santa Fe or another city with a high altitude, the first cake you made in your new home probably didn’t turn out so well. But take heart: it was likely the high elevation and not you. High-altitude baking can be tricky, but there are solutions to get you back on track. We’ll explain what’s happening in the first place and how you can overcome the challenges of high-altitude baking.
When it comes to high-elevation baking (3,000 feet above sea level and up), you’ll notice differences from baking at sea level, including cakes that can be bone-dry or flat as a pancake. While you may not think of bakers as scientists, there is actually a lot of science behind the art of baking. Ingredients react in certain ways under specific conditions, so when the conditions change, those chemical reactions do as well, and you end up with a different product.
In this case, atmospheric pressure is the wild card. There’s less of it at higher elevations because the air is thinner. This causes water to boil at a lower temperature and evaporation to occur faster, which can result in drier baked goods. The gases from leavening agents that cause dough to rise (baking powder, baking soda and yeast, to name a few) expand more quickly, making cookies and cakes rise rapidly and then fall flat, as the one below did.
Still, you can get perfect, made-from-scratch cakes, cookies and other bakes in the mountains. Here’s how to adjust all your favorite dessert recipes for high-altitude baking. Follow these guidelines, and with some time and practice, you’ll surely master high-elevation baking.

How to Adjust Recipes for High-Altitude Baking
| Adjustment | Unit | 3,500-6,500 feet | 6,500-8,500 feet | 8,500-10,000 feet |
|
Oven Temperature
|
Per Recipe
|
↑ 15°F
|
↑ 20°F
|
↑ 25°F
|
|
Baking Time
|
Per 30 Minutes
|
↓ 5 minutes
|
↓ 5-8 minutes
|
↓ 8 minutes
|
|
Sugar
|
Per Cup
|
↓ 1 tablespoon
|
↓ 1-2 tablespoons
|
↓ 1-3 tablespoons
|
|
Liquid
|
Per Cup
|
↑ 1-2 tablespoons
|
↑ 2-3 tablespoons
|
↑ 3-4 tablespoons
|
|
Flour
|
Per Cup
|
↑ 1-3 tablespoons
|
↑ 3-4 tablespoons
|
↑ 4 tablespoons
|
|
Leavener
|
Per Teaspoon
|
↓1/8 teaspoon
|
↓1/4 teaspoon
|
↓1/4 teaspoon
|
To adjust recipes for high-altitude baking, try increasing the oven temperature, adding more liquid or flour, decreasing the baking time and using less sugar or leavening agents. We’ll go over specifics on those in a minute, but the key thing to keep in mind is that every city, home and kitchen is different, so what works for your neighbor may not work for you and what works at 3,500 feet may flop at 7,000 feet.
The best way to adjust a recipe for high-altitude baking is to start by making it as written to see which specific issues you run into. Then make the recipe again, using the smallest suggested adjustments (start at the low end when given a range), because that’s all it might take to keep your cakes from sinking.
Perform one adjustment at a time (except for anything that goes hand in hand, like higher baking temps and lower baking times), so you can really zero in how it affected the bake. If you change too many things at once, you might not know which one helped. Keep baking until you get it right, taking notes along the way so you remember for next time.
How to adjust oven temperature for high-altitude baking
You’ll likely need to slightly increase the oven temperature when baking at a higher elevation. This helps set the cake’s structure before the cells expand too quickly. An increase of 15 to 25 degrees should do the trick. Don’t forget to preheat your oven fully, and use the middle rack to ensure even heating. And for added measure, use an oven thermometer to double-check the actual temperature inside the oven.
How to adjust baking time for high-altitude baking
If you increase the oven temperature, then you’ll also need to decrease the baking time. This one is self-explanatory. Since the temperature is higher, the cake doesn’t need to bake as long. Decreasing the bake time by five to eight minutes is a good place to start.
How to adjust sugar for high-altitude baking
You may also need to decrease the amount of sugar in a recipe. Faster evaporation increases sugar’s concentration, weakening a cake’s structure. Decreasing the sugar by about 1 tablespoon per cup will ensure the cake is strong enough to rise and hold its height. If you are at a very high elevation, it may require up to 3 tablespoons less sugar per cup.
How to adjust liquids for high-altitude baking
To prevent your bakes from drying out you may need to increase the liquid in the recipe. Since liquids evaporate more quickly at higher altitudes, adding more liquid will keep your cake moist. Increase the liquid measurement by 1 tablespoon per cup at 3,500 feet, adding 1 to 1-1/2 teaspoons more for every additional 1,000 feet. This could be water, milk or as simple as adding an extra egg, or using an extra-large instead of a large egg.
How to adjust flour for high-altitude baking
You may need to slightly increase the amount of flour when baking at high elevation, especially for angel food or sponge cakes. Rapid expansion of air in the batter can make the cake’s texture coarse, even if it doesn’t fall, so you may need more flour for a more delicate crumb. You won’t need much; just 1 extra tablespoon per cup at 3,500 feet, and then 1 tablespoon more for every additional 1,500 feet.
This tip is tricky, though. Sometimes you may need to decrease the flour by about the same amount to avoid a dry bake because the batter will absorb more liquid. A key aspect of this adjustment is making sure you measure flour correctly the first time. If you pack too much flour into the measuring cup or don’t fill the cup all the way, it’ll be difficult to tell whether you need to adjust it later on and in which direction.
How to adjust leaveners for high-altitude baking
To adjust leaveners for high-altitude baking, it’s best to decrease the baking powder. Since leavening gases expand more quickly at higher elevations, you don’t need as much of the agent. Reduce each teaspoon by 1/8 teaspoon at 3,500 feet and by 1/4 teaspoon at 6,500 feet and up.
High-Altitude Baking Tips
How do you bake a high-altitude cake leavened with egg whites?
To bake a high-altitude cake leavened with egg whites, you only need to beat egg whites until soft peaks form. Stiff peaks, which holds more air, can cause your cake to collapse because the air expands too quickly, before the cake is fully set. Hey, less work for you!
How do you bake high-altitude yeast bread?
To bake high-altitude yeast bread, decrease the yeast by 1/4 to 1/2 teaspoon for every 2-1/2 teaspoon package called for in the recipe. Also, you may want to add an extra 1 or 2 tablespoons of liquid per 1 cup of flour so the bread is fluffy, not dry.
Be careful when proofing dough, too; the decreased atmospheric pressure gets the yeast moving and grooving quickly, causing the dough to rise rapidly. If your dough looks over-proofed, punch it back down with your knuckles and let it rise again. Don’t use the suggested proofing time in the recipe. You’ll have more success going by the visual cues or the amount of needed dough rise in the recipe. Over-proofed dough can produce dry, heavy or misshapen loaves.
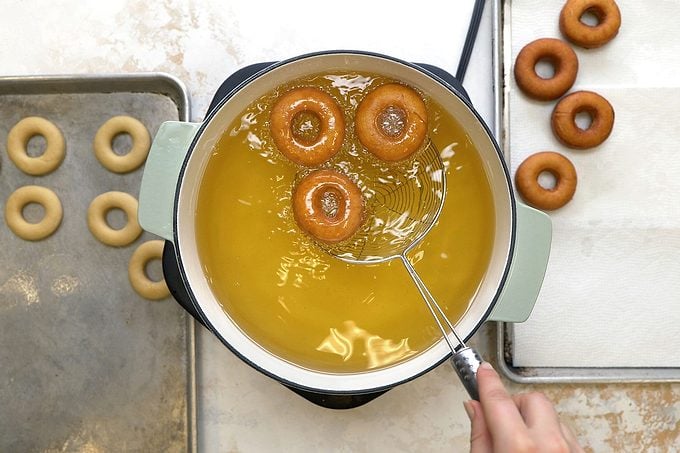
How do you deep-fry doughnuts at high altitude?
To deep-fry doughnuts at high altitude, you’ll want to decrease the frying temperature by about 3 degrees for every 1,000-foot increase in elevation. The higher the elevation, the lower the boiling point of liquids, so you’ll need to adjust the oil’s temperature to prevent an overly browned exterior and undercooked interior. When deep-frying at home, always monitor the temperature with a deep-fry thermometer to maintain the proper oil temperature.